How to Trade AUDUSD: A Step-by-Step Range Strategy
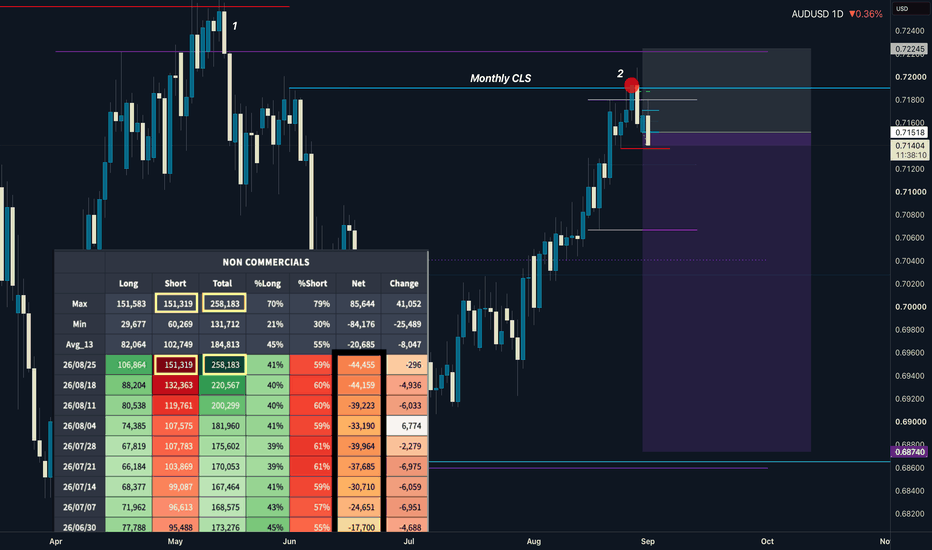
A Practical Guide to Trading AUDUSD Ranges
Many aspiring traders struggle with finding clear entry and exit points. A powerful way to overcome this is by using a structured, range-based methodology. Let's walk through how you could apply the principles from my recent AUDUSD analysis to your own trading. This step-by-step guide will help you learn forex trading with a more systematic process, a key focus in our trading course.
This approach is based on the CLS Strategy, which focuses on how institutional players manipulate price around key structural points. The goal is not to predict the future but to react to clear market signals.
Step 1: Identify the Trading Range
First, you need a defined playing field. On your chart (in this case, the daily timeframe for AUDUSD), identify a clear consolidation or range. This means finding a visible swing high and swing low that have contained price for a period.
- Mark the Range High: This is your key resistance level.
- Mark the Range Low: This is your key support level.
This range is now your area of focus. You are no longer concerned with every minor price fluctuation; you are waiting for the market to show its hand at the boundaries of this range.
Step 2: Wait for Manipulation (The Liquidity Grab)
This is where patience becomes your greatest asset. Instead of trading the breakout, you wait for the failed breakout. For a short setup, you would watch for price to trade above the marked range high.
This move is often designed to trap eager breakout buyers and trigger stop-losses. It looks bullish to the untrained eye, but for a CLS trader, it's the first part of a potential setup. Do not enter yet. Your job is simply to observe this manipulation into a key resistance zone.
Step 3: Look for Confirmation (The CIOD)
After price has pushed above the high, you need confirmation that the move was indeed false and that sellers are taking control. This is the most critical step and separates professional execution from gambling. We call this a Change in Order Flow (CIOD).
What does this look like?
- Rejection: Price fails to continue higher and starts to fall back into the range.
- Bearish Candle Close: You must wait for a candle to close decisively back inside the range. As I always emphasize, never enter on an intra-candle move. The close is your confirmation.
- Structure Shift: On a lower timeframe, you might look for a break of the most recent low that was formed during the manipulation phase. This confirms sellers are now in command.
Step 4: Define Your Entry, Stop, and Target
Once you have your confirmation candle close, you can plan the trade. This is a crucial skill for any funded trader who must manage risk meticulously.
- Entry: You could enter on the close of the confirmation candle or wait for a small retrace.
- Stop Loss: Your stop loss must be placed in a logical location, typically above the high of the manipulation move. This invalidates your trade idea if you are wrong.
- Target: A high-probability target for this setup is the 50% level (equilibrium) of the entire range you identified in Step 1. This is a logical take-profit area as markets often revert to the mean.
By following these steps, you transform trading from a guessing game into a disciplined, repeatable process. This is the foundation of the CLS strategy and the path to building long-term consistency in the markets.
WRITTEN BY
David Perk
Full-time forex trader and mentor. $1M+ verified track record on FX Blue. Teaches the CLS strategy to funded traders — live, five times a week.
Want to trade this alongside David?
Join the community — livestreams 5× a week, trade breakdowns, and entries called in real time. Your first week is free, full access to every paid feature.
Join the community — first week freeNo experience needed. Cancel anytime.